Make a Pretty Princess Fabric Crown
Hi COM readers!! I am so so excited to be here today sharing this with you!!
I’m Ashley,
I’m Ashley,
and I blog over at Cherished Bliss.
(Maybe you’ve heard of me… ok probably not, but a blogger can dream right? ; )
I’m a stay at home mom to an adorable son and daughter! I am also married to the most wonderful husband ever; it’s all because of my wonderful family that I am inspired to create! Something you must know about me… I am completely and utterly addicted.to.coffee… in a bad kind of way!! I use it quite often to get done the things that I’m working on!
I’ am not nearly as organized as I wish…at any given moment I am working on more things than I can count! My house is not perfect, you might and probably will step on a toy if you ever come to my house. BUT my kids are happy and I get to do what I love (be a mommy, and create things for my home and family).
You will find typo’s in my posts because well.. when you are proofreading with “mommy, mommy, mommy, mommy” in the background I naturally start reading faster : )
I’d be tickled pink if you stopped by and said hi, have an internet coffee date with me! I love meeting new people, so go ahead, hop on over!
I have to say I really enjoyed making this! Probably because I have been playing with my serger like a kid with a new toy! You don’t have to serge it though.. it just made it a little easier for me. I’ll be giving instructions for both serging and sewing.
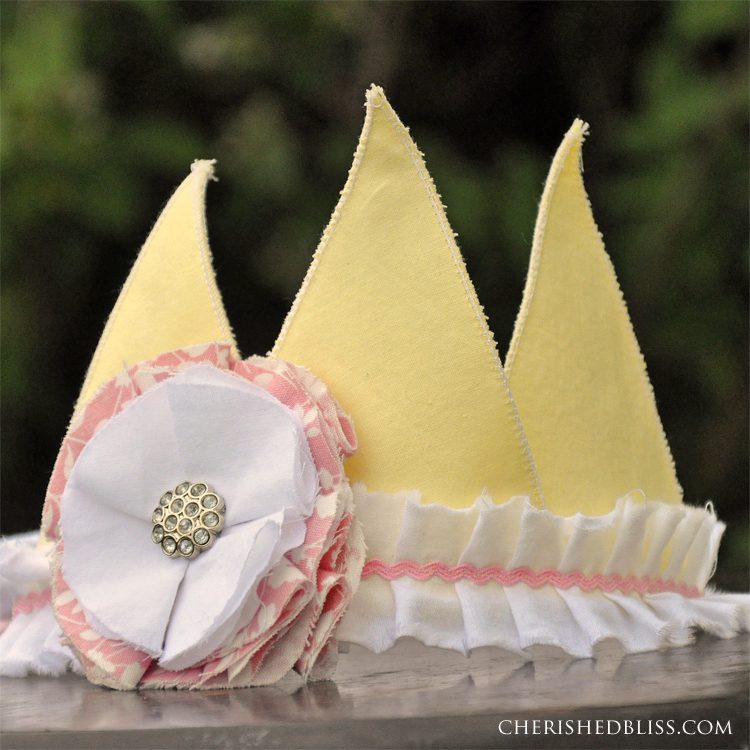
If this is your first time meeting me, I made this to go along with my daughter’s dress for her pink lemonade party…isn’t it cute?! Too bad she wore it for about 30 seconds!
{Supplies}
-1/4 yard Fabric
-1/4 yard Craft weight interfacing
(even less of each if you happen to have scraps lying around)
-Long strip of fabric to ruffle Length can vary, 2” wide. I wanted mine to hang down in the back when tied.
-Fabric for flower and other accents
-Mini Ric Rac
-Invisible thread (optional)
-Serger (optional)
-Ruffle foot (optional)
-Basic sewing tools
{Tutorial}
The first thing you are going to want to do is figure out what size to make your triangles. My daughter’s head was about 18.5” around so I wanted the crown to be at least half that so I made the width of all the triangles together 9”. I overlapped each triangle about an inch, so make sure to take that into consideration. Then figure out the height you want for each triangle.
This doesn’t have to be exact because the ties will allow for adjusting, so don’t stress at this step!
One. (cutting your fabrics)
Once you figure out the size of your triangles, cut out 6 of them in your main fabric. Then cut 3 triangles out of your craft interfacing that are slightly smaller than your fabric triangles.

Once you figure out the size of your triangles, cut out 6 of them in your main fabric. Then cut 3 triangles out of your craft interfacing that are slightly smaller than your fabric triangles.

Two.
Next lay your interfacing on one triangle with the shiny side down and iron according to instructions included. Then put another triangle on top of the interfacing. Serge around all three edges.
Next lay your interfacing on one triangle with the shiny side down and iron according to instructions included. Then put another triangle on top of the interfacing. Serge around all three edges.
**Now if you do not have a serger instead of “sandwiching” the interfacing, iron the interfacing to one triangle just as we did above, but then take your other triangle and put them right sides together, sew around leaving a gap to turn. Turn the fabric right side out and top stitch around. This will eat up some of your width and height so make sure you include for that if you aren’t serging the edges.
Three.
Let’s attach the triangles now. put the middle one in front and then line up the other two on the sides, behind the middle triangle. Pin in place. Make sure your gaps are even in between each triangle or it will look funny! Then sew along the bottom so to attach them all to each other.

Let’s attach the triangles now. put the middle one in front and then line up the other two on the sides, behind the middle triangle. Pin in place. Make sure your gaps are even in between each triangle or it will look funny! Then sew along the bottom so to attach them all to each other.

Four.
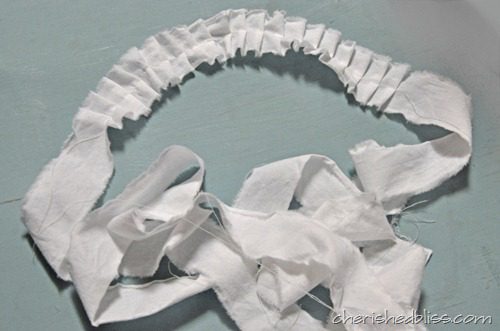
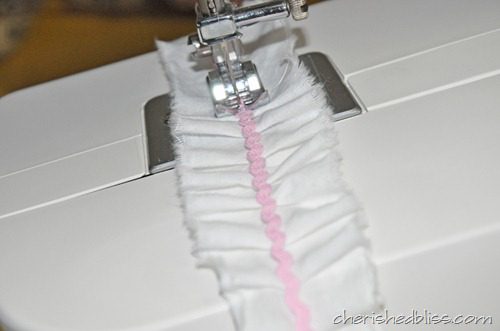
Ok, now set that aside for a little bit and lets work on the ruffled strip. I actually used a ruffle foot for mine, but you can do it without too. I took my strip of white fabric (muslin) which was about 2 yards long and about 2 inches wide and I found the middle of it. Then I moved out from the center until I had about 20 inches, 10 inches on each side of the center point. Then I ruffled until I had the width of my crown (9 inches long) and stopped there. So I had a long piece of fabric with ruffles in the middle (I guess they are more like pleats, either way)
Ok, now set that aside for a little bit and lets work on the ruffled strip. I actually used a ruffle foot for mine, but you can do it without too. I took my strip of white fabric (muslin) which was about 2 yards long and about 2 inches wide and I found the middle of it. Then I moved out from the center until I had about 20 inches, 10 inches on each side of the center point. Then I ruffled until I had the width of my crown (9 inches long) and stopped there. So I had a long piece of fabric with ruffles in the middle (I guess they are more like pleats, either way)
Five.
Take your mini ric rac and invisible or coordinating thread and sew it down over the stitching that created your ruffles. I left my ric rac long as well so that it was mixed in with the extra muslin for tying.
Take your mini ric rac and invisible or coordinating thread and sew it down over the stitching that created your ruffles. I left my ric rac long as well so that it was mixed in with the extra muslin for tying.
Six.
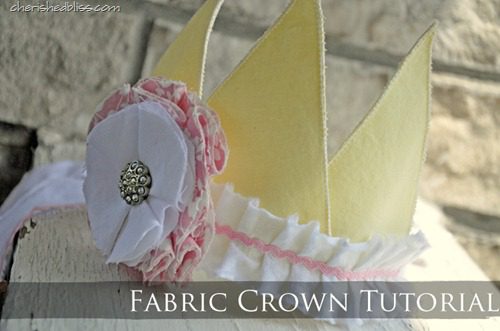
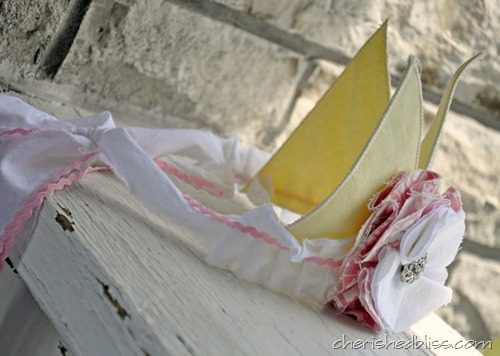
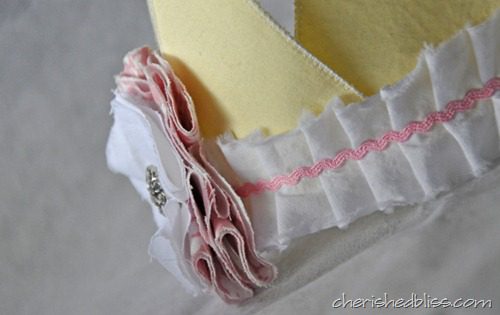
Once you are done with that you will attach your ruffled/pleated fabric to your triangles — lining up the ruffled section with the base of the triangles. Then Sew right down the middle of your ric rac again making sure you are attaching it to the base of your crown. (side view below)
Once you are done with that you will attach your ruffled/pleated fabric to your triangles — lining up the ruffled section with the base of the triangles. Then Sew right down the middle of your ric rac again making sure you are attaching it to the base of your crown. (side view below)
Seven.
Next I added my fabric flower and just hot glued it where I wanted it and you are done.
Next I added my fabric flower and just hot glued it where I wanted it and you are done.
EXTRA: I knew my daughter wouldn’t leave it on well and that I would have a hard time tying it so I hot glued on a piece of lace elastic that I use for headbands so that it would sit firmly while I attempted to tie : )
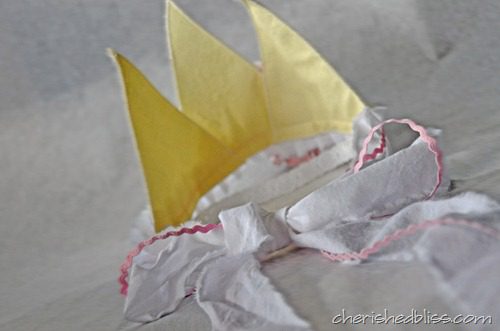
Here’s the back showing how I tied the bow with the fabric and ric rac. I LOVE ric rac… is that weird? : )
Do you have a little girl who would want to wear these? Addison just doesn’t do hair accessories. I’m honestly so surprised cause she’s completely dainty and girly! Doesn’t she know she has a mama who wants to make her these things?!? : )
Here are a few of my other “pink lemonade” projects.
(click the picture)


and a little sneak peak at her party! : )

(click the picture)


and a little sneak peak at her party! : )

If you enjoyed my tutorial today I’d so love to meet you! You can keep up with my other posts…
{Subscribe to feed} {Like on Facebook} {Follow on Pinterest}

{Subscribe to feed} {Like on Facebook} {Follow on Pinterest}
Thanks so much for having me Jen! It was a pleasure being here!!
ASHLEY I am dieing over this complete cuteness of a crown. WELL DONE. So perfect for little girls and for a Princess Party, Dress up, or just any Ol’ day.
Thanks for sharing it.
jen


Thanks so much for having me Jen! It’ is such an honor to see my tutorial on your blog! : )
Such a cute little crown–love it!
Of course we’ve heard of you :O) You have a fabulous party once a week & everyone is invited!! Cute tutorial!
Adorable! Miss those little princess years with my girls. Oh the things I could have created if I knew of all you bloggers then!
~Bliss~