Guest Post- Awesome Homemade wood coasters!
Hi! I’m Natalie from A Turtle’s Life for Me and I’m so excited to be the guest poster today at
Craft-O-Maniac! And can I just take a minute to say that I emailed Jen with this idea (on a weekend,
no less!!) and she replied in, oh, about 6 minutes!!! Say wha??? She was so sweet and I was SO excited!
I’ve always believed there are 2 kinds of people who go to craft shows… the ones who come home with all kinds of goodies to display around their house, and the ones who come home with a head full of ideas for how they can re-create everything themselves for much cheaper! I’ve always been that second gal. No matter what I see, i.e. a painting, a wedding cake, a playhouse, curtains, I always get this silly notion in my head that “it can’t be that hard, right?”. Trust me, sometimes it is hard and I should leave it to the pros, but sometimes… every so often… I actually get it right! Today I’m going to show you one that I was just tickled with!
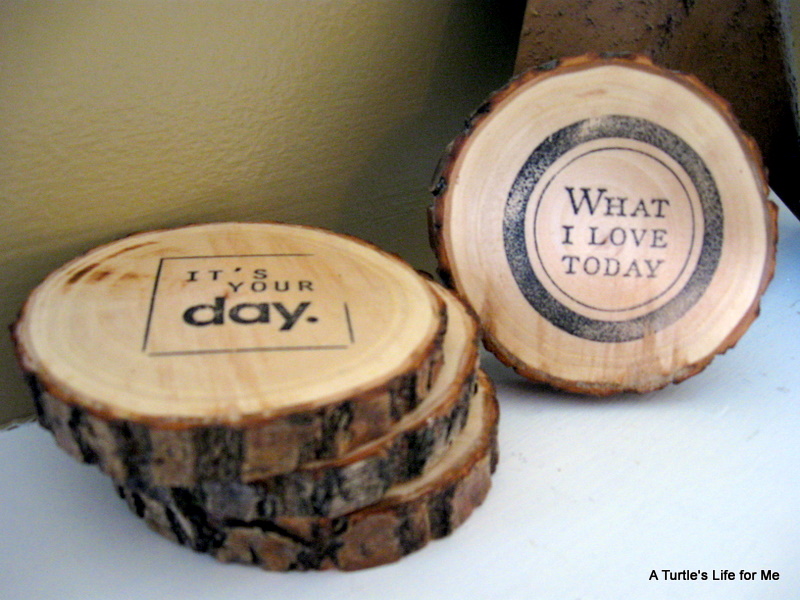
Homemade wood coasters!!

About a month ago, we had a stinker of an ice storm. Our giant willow tree out back got hit hard and we were left with this mess to clean up. (pssstt, notice my handsome hubby in the background?? He was so excited with his rented chainsaw that he went around for 3 hours doing the neighbors’ trees!)

From this mess, I went around and started collecting branches that were pretty uniform in size and about 3″ in diameter. While we had the chainsaw rented, I had my hubby cut them into discs that were about 3/4″ thick.

I laid them all out on a vinyl tablecloth and let them sit for a couple days to get all the moisture and sap out. Every day I would go in and flip them over (when I thought of it. shhhh!!). At this point they’re pretty rough on the surface and not looking too pretty.

.So now came my favorite part, I sent them to my BIL who works as a carpenter and has access to a table sander. He sanded them nice and smooth for me and when I got them back, all I had to do was add a stamp! Once I had them stamped, I sprayed them with some polyurethane finish since wet drinks would be sitting on them. I did 6 coats of the spray finish just to be safe.
And here they are in all their glory!
These would be awesome in an Easter basket, maybe an adult-themed basket with a bottle of wine and some new glasses. Just wrap some cording or twine around and put right in the basket!

Let me know if you try this- I’d love to see all the different versions people could come up with! And take a minute and come visit me at A Turtle’s Life for Me! I’ve got painted signs, Cricut crafts, a playhouse make-over, decorated cakes and tons more! Stop by and say hello! And a big thanks to Jen for being so welcoming to a newbie blogger like me!!
ISN’T THIS SO INCREDIBLY CREATIVE AND CUTE? I JUST LOVE THIS. Thanks Natalie for the tutorial and sharing this with us. WINKS- JEN
What a really cute idea! Too bad I didn’t see this right after Katrina LOL I could have had all the wood i needed.
Brenda
Oh these are fabulous!
These are really cool! My cousin was talking about us doing these awhile back, now we’re gonna have to get busy doing them! I think they would make great gifts 🙂
following natalie over from her blog, and now i’m a new follower!
great project, natalie & great blog, jen!
Thanks SO much for all the feedback guys! It seriously means so much to me! And thanks for having me, Jen! Such a fan of you and your blog!
I love the modern/rustic combo of these coasters!
These are totally cute! I love them!
featured this on my blog today!
kimboscrafts.blogspot.com