Feature Guest Post- {Darling Pencil bag with Tut.}
Hi there!
My name is Jill from Creating my way to Success

I blog about things I sew, tutorials so you can make them too, and ways both I and others are trying to use creativeness to find success.
I’m so excited to be guest posting here on Craft-O-Maniac!
(Thanks Jen!)
Here’s one of my ‘anyone can sew‘ projects!
My girls can always use a new pencil case. They have lots of different styles, sizes and colors already but still I had a request for another new one – this time with two zips. It was nice and simple to make – so I thought I’d make another of my tutorials that anyone can sew in just 5 steps and 15 minutes! Here it is!
My name is Jill from Creating my way to Success
I blog about things I sew, tutorials so you can make them too, and ways both I and others are trying to use creativeness to find success.
I’m so excited to be guest posting here on Craft-O-Maniac!
(Thanks Jen!)
Here’s one of my ‘anyone can sew‘ projects!
My girls can always use a new pencil case. They have lots of different styles, sizes and colors already but still I had a request for another new one – this time with two zips. It was nice and simple to make – so I thought I’d make another of my tutorials that anyone can sew in just 5 steps and 15 minutes! Here it is!

First gather your materials. You will need two long zips – 37cm (14.5″) or longer. I generally get my zips from the local charity shops where they sell them for around 20c each!
Then some funky material – I got this lovely bright octopus fabric as a remnant for just $1! There’s still plenty of it left over to make something else too!
The size pieces of fabric you will need to cut are:
2 pieces 37 x 27cm (14.5 x 10.5″)
1 piece 37 x 10cm (14.5 x 4″)
1 piece 37 x 18cm (14.5 x 7″)
2 pieces 4 x 8cm (1.5x 3″)
Step 1:
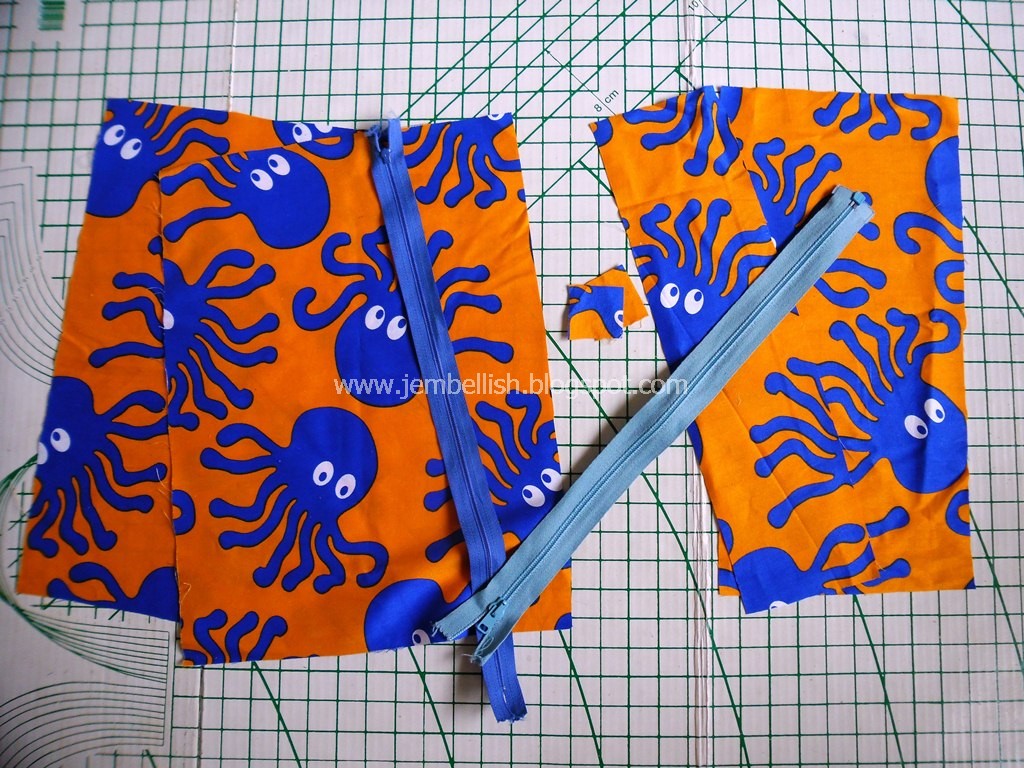
Attach the middle front zip. Lay the zip face down at the top of your larger front panel and pin into place:

Using the zipper foot on your machine – stitch into place, then flip the fabric over and top-stitch along the edge of the zip to stop the fabric catching in the zip when the pencil case is opened and closed!

Then repeat this with the top panel of the front of the pencil case. Place the panel face down on the top edge of the zip and pin into place:

Stitch then flip the fabric over again and top-stitch close to the zip again.

Step 2:
Cover the ends of the top zip.
Use your two small pieces of fabric. Fold the edges and pin to either end of the zip so they make the zip a little narrower than the pencil case itself:


Stitch these pieces in place. Make sure you stitch slowly over the zip teeth so your needle doesn’t slip or break!

Step 3
Attach the top zip to the front and back panels of your pencil case.
Place one of the larger panels face up, then lay the one you just made with the front zip face up on top of that. Then lay the top zip face down at the top and pin through all 3 layers.

Stitch the zip in place,
then once again flip the fabric over and top-stitch.

Then pin the final back panel face down to the remaining free edge of the top zip:

Stitch and top stitch for the last time!

Step 4
Lay the pencil case out flat and make sure your zips are open! This is very important!!

Now fold the pencil case right sides together and pin all the way around the edges.

Then stitch the 3 sides.

When you stitch over each zip end, run the stitching backwards and forwards a few times to secure!

Step 5
Trim the edges of the zips and the fabric:

If your fabric looks like it might fray – you can finish the 3 edges off either with an overlocker (serger) if you’re lucky enough to have one; or just zig zag stitch and trim the edges, or trim with pinking shears!
 =”border:>
Turn the case out through the top zip and you’re done!!

Fill it up with pens, pencils and drawing books or paper and it’s ready to go!

I hope you liked this tutorial.
There are lots more simple tutorials for useful things to make in just 5 steps and 15 mins ; and also more detailed tutorials for the more adventurous sewer on my tutorials page!
Thanks again to Jen for having me over on your fabulous blog!

AND THANK YOU JILL FOR SHARING THE DARLING PENCIL BAG AND GREAT TUT. I am THRILLED TO OF SHARED YOUR PROJECT ON COM.
WINKS, jen
Thanks for the feature Jen!
This is so cute! It makes me wish I still had little ones around to make it for 🙂
Thanks for sharing Jill. Every pencil case needs two compartments, I think, so this is perfect! Tash
I’ve always been afraid of zippers, but this makes it look really easy. I may try and tackle them finally!