Guest Post- Tai Dye Original- a Bug infestation!
Hello fellow Craft-O-Maniacs!! I am Tai the girl behind TAIDYEORIGINAL. I am BEYOND geeked to to be here on Jen’s
AM-A-Z-AAANNNGG blog today! I am excited to take a vacation from my blog to visit Craft-O-Maniac …while I take a break today and let her do all of the work I am going to sit back and enjoy a diet coke in her honor. mmmmm
Oh wait! I almost forgot…here is a super fun tutorial I wrote for you to try. These are super quick LOVE BUGS. Bet you cant make just one…
UPDATE: I have had some emails and comments that the link for the pattern is not working. I believe this is corrected now. If you are unable to download the pattern please email and I will be happy to send it to you! 🙂
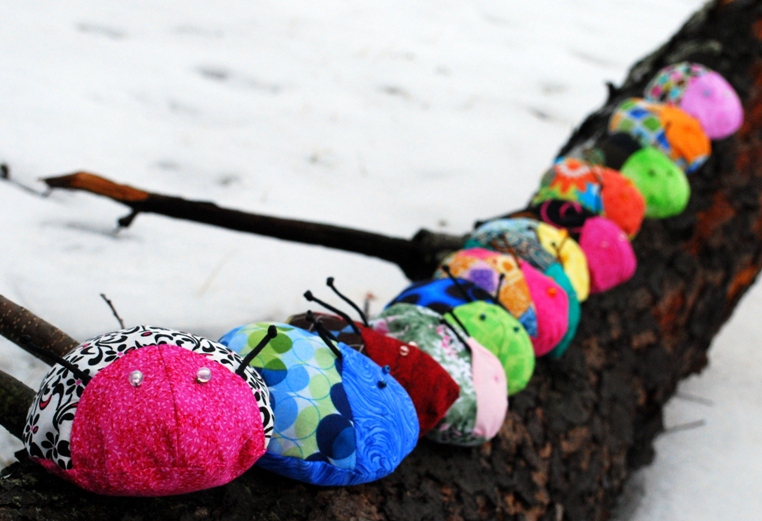
As promised – the infestation is here!! I have officially fallen in love with the little guys (and girls) and I hope you will too!
This is going to be a little long …bear with me. I started making these and they are SO quick. About 15-20 minutes each. However, I didnt realize how many steps there were until I started taking photos for the tutorial. I tried to be very detailed. Trust me though, it only take about as long to make one as it takes to read this.
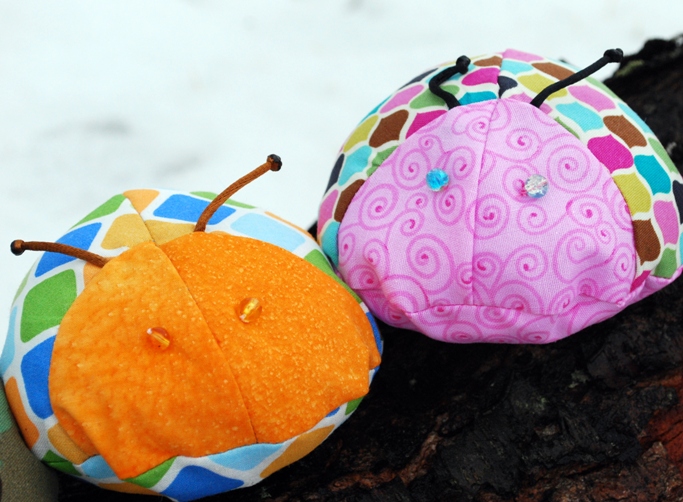
Aren’t they DARLING?? I made bunches for Elijah to hand out at school as Valentines because if I see one more Mater Valentine I might just puke.
What you will need:
The Love Bug Pattern HERE
A few scraps of coordinating fabric – fat quarters, scraps, whatever you like
needle and thread
pins – they are a pain, but are essential for this
satin cord
polyfil
plastic poly pellets
scissors
lighter or candle
fabric marking pen (or chalk, or pencil)
bead or buttons for eyes (not pictured. whoops)

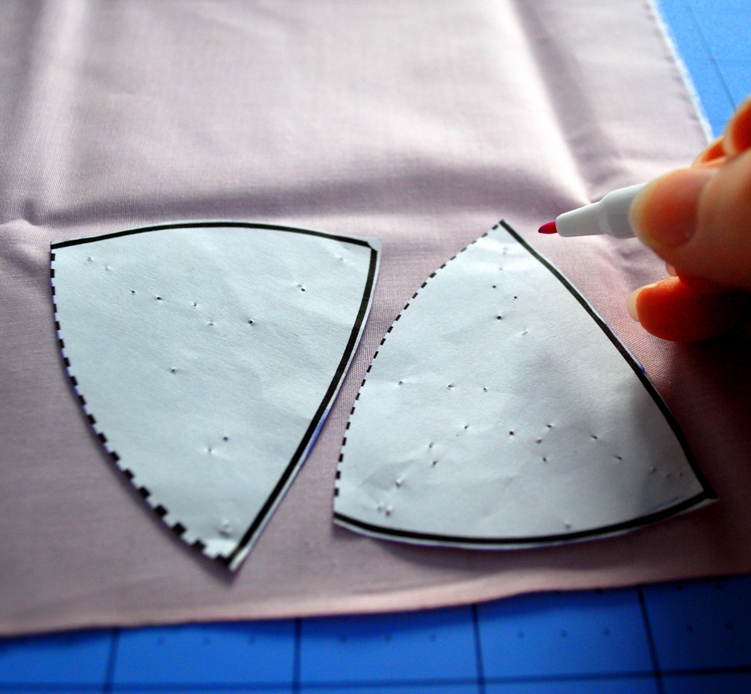
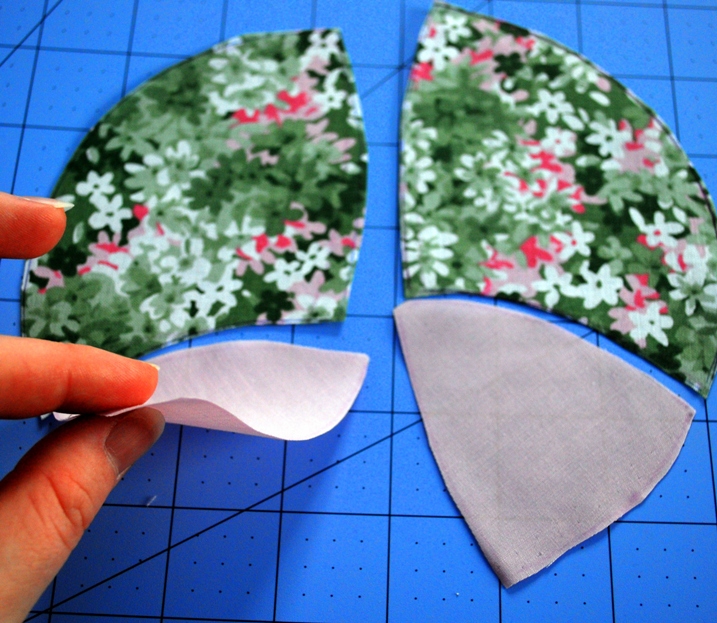
Start by cutting out your pattern and tracing them onto the right sides of your fabric. Then cut them out. For some of these I made the wings and belly the same and for some I made the face and belly the same. Go with what you like.

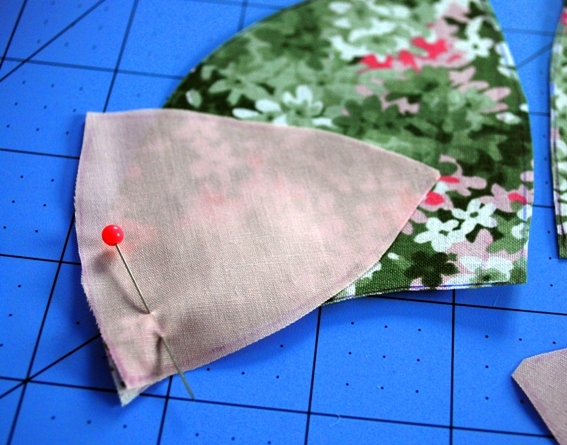
Next, Lay the wings and face right sides up. flip the face pieces so they are right side down on the wing
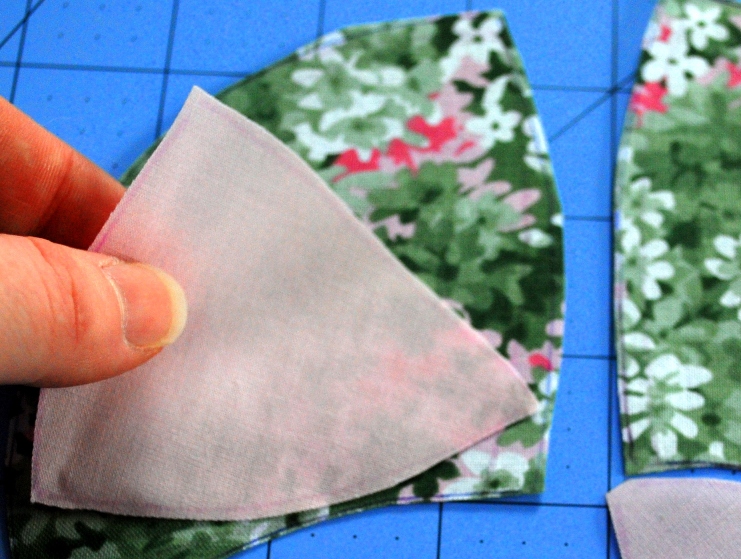
this is the trickiest part of the whole process. line up the corners on the face to the corner of the wing and pin. It is going to curl up some but it isnt too hard to make this work. I used lots of pins to make sure this would stitch together smoothly. Start with pinning each corner, add one in the middle and then 2 more between the outside pins and the middle pin


Time to make the antenna. Cut a 2 pieces of satin cord (mine were probably around 4 inches), tie a knot toward one end

clip it short
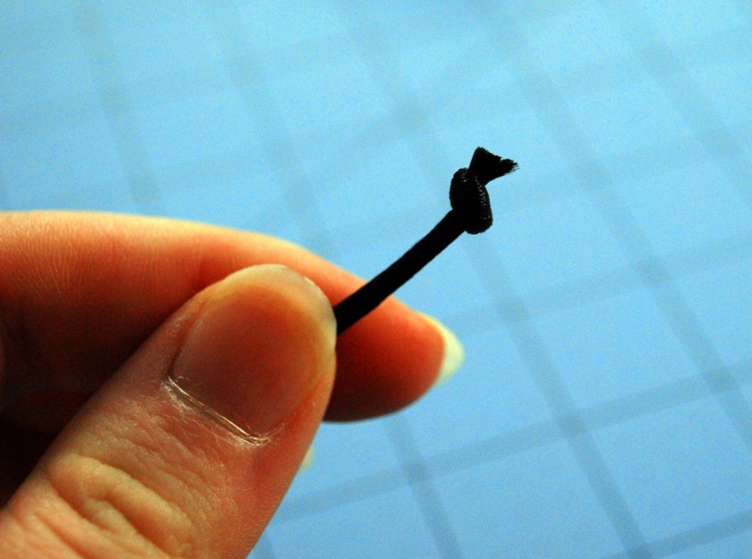
next use your lighter to heat seal and melt the end of the cord

If you have ever made synged satin flowers this is the same technique

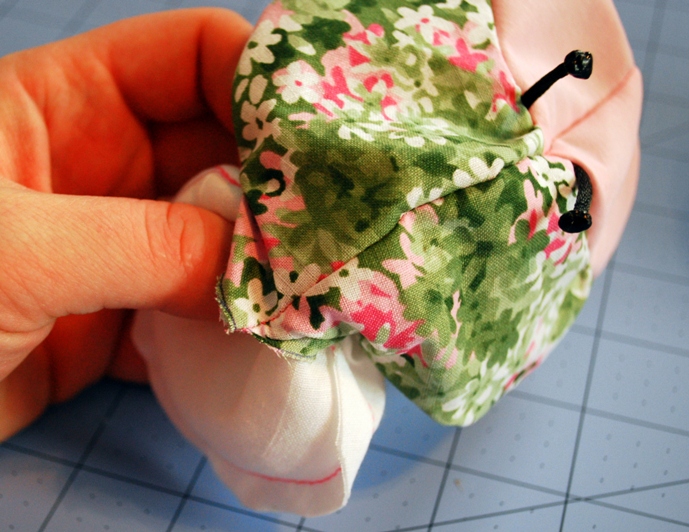
slide the antenna between the pins like this:
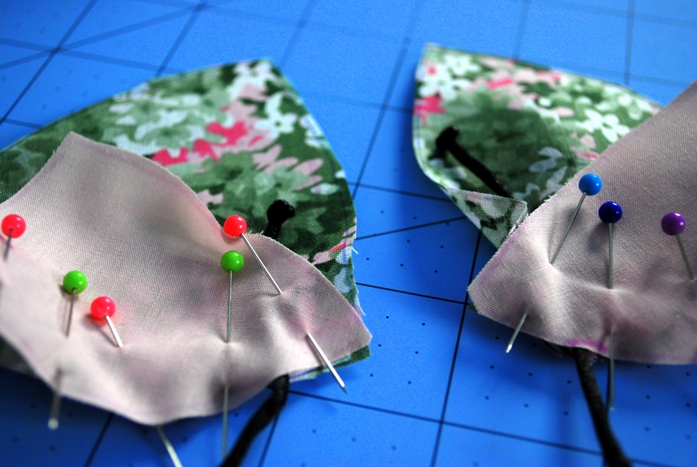
sew the seam. Next place these pieces right sides together and pin. I started by pinning the seams together to make sure they would stay even

add more pins and sew together

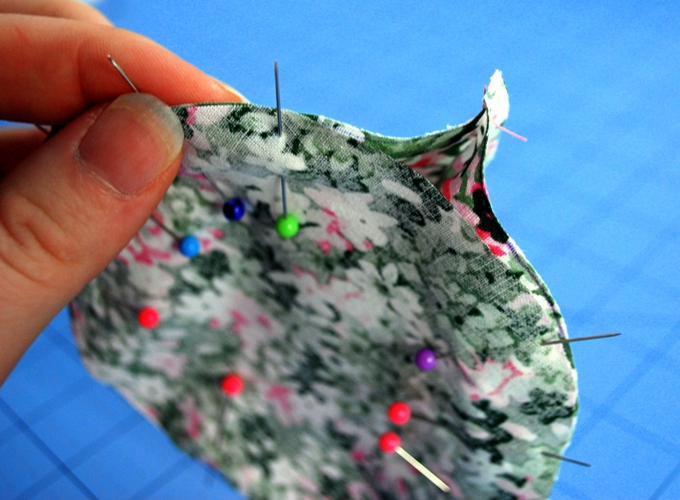
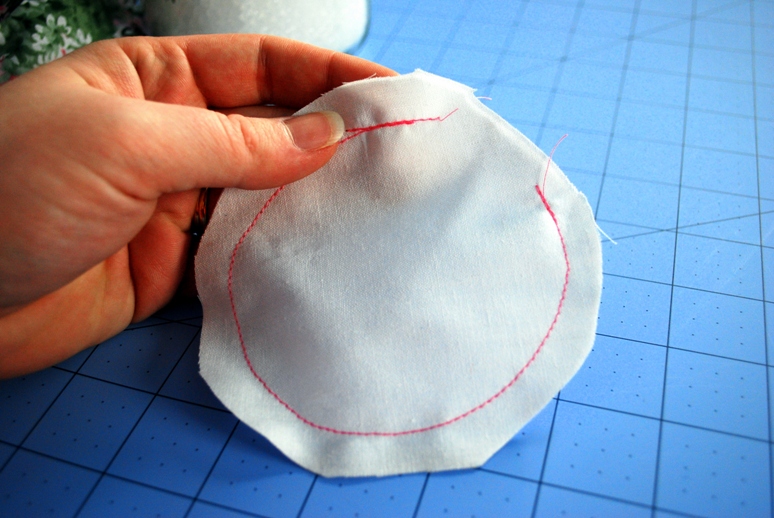
place the top of your bug and the belly (circle) right sides together and pin again. I left the opening in the back. See how there is a gap? That is ok. it will take some love to hand stitch these together since they are different lengths but it helps add dimension to the back of you bug. He will look more dome shaped
stitch together and turn right side out. Set him aside. Time to make the guts. I wanted these to have just a little weight to them. Cut out 2 circles (a little smaller than the belly piece) of whatever scraps you have on hand.

Sew them together but leave some opening
fill the pouch with the poly pellets. Dont stuff it tight, it should feel sort of like a beanie baby

sew it shut and trim

add the small pouch of pellets into the bug and lay it flat against the belly side
You can sort of see it in there, right? Just pretend you can.

Put a little polyfil on top of the pellet pouch and stitch him closed

Add some pretty beads to make the eyes

Ta DA!!! LOVE BUG!!

……
…
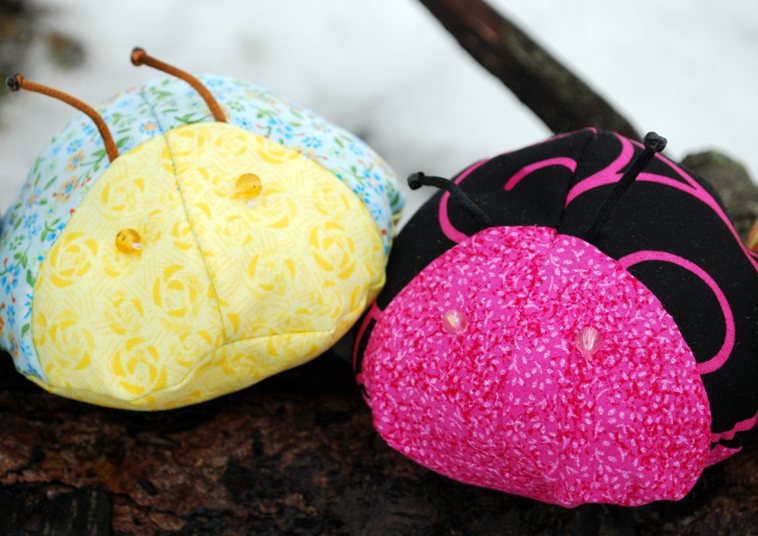
Now go totally insane and make a boat-load of them!!

curse winter and then determine these cute pictures are totally worth the frost bite!

Please let me know if you try this tutorial!! I hope you enjoyed!
Thanks so much Tai, these are certainly adorable. Go Visit Tai’s blog. Thanks again, Jen
I loveeeee them! As soon possible, I try to create a little bug! 😉
Thank you for this tutorial!
Bye bye
Mopo
Thank you so much!
I love this tutorial! I really wish I could sew because these are precious. 🙂
I’ve got a package of pellets and a closet of fabric. I can’t wait to try some of these. Thanks.
How super cute are those?!?!