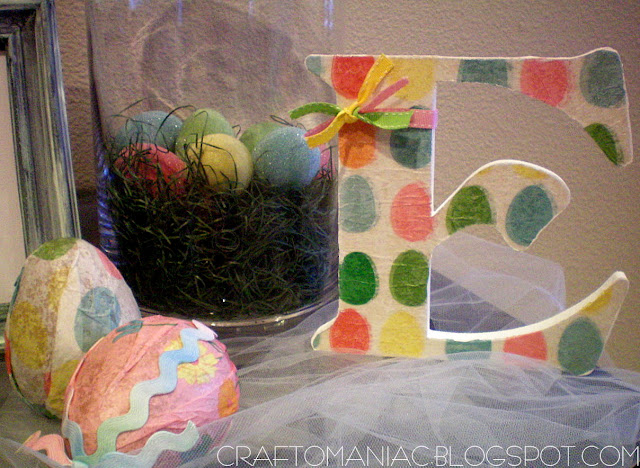
Decoupaged Easter letter "E"
I picked up the Wood “E” at Roberts Crafts. I am sure most craft stores carry un-finished wood letters. I wanted an “E” for Easter.. you can have it for Eggs too. Let me begin with the tutorial …..
First~ use your wood “E” and trace it out on a napkin with a pen. Just be careful while tracing and cutting, as you are working with a thin napkin! I traced and cut out an “E” twice, I wanted extra coverage on the wood!
It should look like this when you are done! JUST LIKE THE WOOD “E” Then you will paint MOD PODGE on the wood, then gently lay the napkin “E” over the wood and apply another coat of MOD PODGE over the napkin. LET DRY!
THEN cut off the excess napkin with scissors. Its really easy the wood letter acts as a straight guide while cutting, or snipping!
LET THE mod podge dry, and then paint the wood that is still exposed.. I chose white. I didn’t paint the underneath or back…. but you can if you want.
thanks for stopping by, xo jen


loooooove it!!
u rock!
I still can’t believe you used a napkin for that it’s so cute!!
How super cute! YOu are very crafty….I jus found your blog and love it…
Have a Happy Day
Summer :0)
no way…a napkin? Awesome
no way…a napkin? Awesome
Where do you come up with all of this?! Really?! Awesome!
SO cute!
wow stopping by to say thank you for your sweet comment on my daddybear and barbie post! and look at this great craft idea! well done..im gonna try this one!
I have never modge podged (is that what it’s called? lol) before.
Is it really that easy?
Your blog and so many other crafting blogs that I have recently found have inspired me so much.
Take Care
I love it!
I think I can even do this one!
Very Cute – never thought of using a napkin! You are creative! :o) Thanks for sharing. i guess it’s time for me to take down my Valentines XO. It’s up high and forgot all about it! oops!
Thanks for sharing :o)